

Bikepacking 101
Adventuring by bike is the ultimate way to explore the great outdoors. Bikepacking takes two great past times, bicycle touring and backpacking, and creates an entire new entity with an added twist: dirt and off-roading. Bikepacking is simply exploring mixed terrain on your bike while carrying all the gear you will need for the journey. A bikepacking adventure can be a quick overnighter or span over many days. The best thing is that by using trails and dirt roads, it removes an adventurer away from busy traffic and leads them down the road less traveled. This is an ever evolving sport with new routes, improved gear, and new ways emerging to empower adventure through bikepacking.
Here at Sequim Bike Studio, bikepacking is our jam. There is much more to bikepacking than what we are able to share on this website, but this will get you started on your journey into bikepacking. We love educating and leading fellow cyclists into this amazing sport that channels our inner wanderlust. Different needs and route choices create the need for many different set ups to fit someone's unique bikepacking needs. Just remember to not overthink it, we are here to help you out. At the end of the day, if you are on your bike exploring, that's a win in our book. Keep reading to learn about bike setup, bike choice, and how to plan for a bikepacking adventure.
Let's Talk Bikepacking Setup
What type of bike should I get for bikepacking?
Many questions we get when it comes to setting up your bike for bikepacking sound like, "What gear do I need? Where on the bike do I put my gear? What type of bike should I get for bikepacking?" and so on. These are all valid questions. There is a saying in the Real Estate world that says, "Location, location, location" The location determines the value of the property. In bikepacking, the saying could be, "Route, route, route." In other words, the type of route will determine what type of bike you will want to use. If you are planning a mountain bike route, a mountain bike will most likely be the best option. Many routes can be done on different types of bikes and can be often be influenced by personal experience and comfort. Talking to experienced bikepackers to gain from their experience is the best option for folks beginning their bikepacking journey.

TENT &
SLEEP SYSTEM
FOOD & WATER
Clothes & Misc.
What You Need and Where to Put it
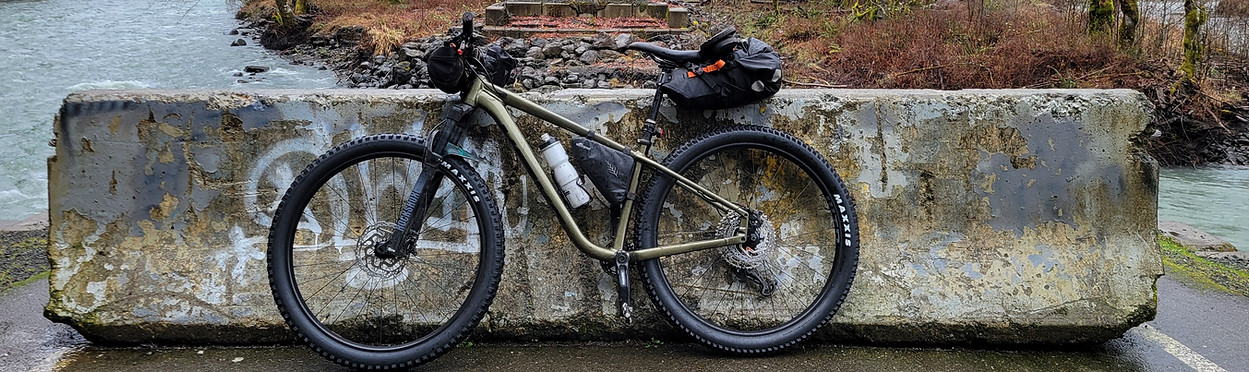
What does a typical bikepacking setup look like? - What gear do I need to bikepack?
Modern bikepacking is in a constant state of growth as people embark on epic journeys that push the expectations and capabilities of both gear and cyclists alike. This being the case, the typical bikepacking setup is still pretty straight forward. The three main storage locations include handlebar bags, frame triangle packs, and behind the saddle on a seat pack or rack system. Generally, clothes and miscellaneous items will be stored on the front handlebar bags, frame packs will carry your food and water, and your sleep system (tent, sleeping pad, sleeping bag) will be packing behind your saddle. You'll want of the weight of your gear will centered on your bike and as low on the bike as you can get it. This helps the weighted bike to continue to give you a controlled handling while you are tackling your route. A GPS unit such as a Garmin device is highly recommended for bikepacking, route planning, and being safe on your bikepacking trips.
Gear choice is predominantly determined by the route you are planning to do, the season/weather that will be present on your trip, and the amenities available to you on the route. We had a bikepacking trip in BC on the Galloping Goose gravel trail in the summer of 2023 that was an epic adventure. We were in shorts and slept in a hammocks that fit in your hand; it was 70 degrees out. Local restaurants and grocery stores made the need for food storage very minimal. Flashback to 2024 bikepacking on Whidbey Island in sub 20 degree weather, you could say our clothing and packing setup was a bit different. Taking the route terrain and weather into consideration will give you an idea how much storage you'll need and the bags you need to accomplish the job. This process is refined by experience and testing out your packing skills. You will find that beginner bikepackers often pack much more than they actually need. We all do it the first few times around. Experience is an excellent teacher. Going on easy local overnighter trips is the best way to gain experience and figure out how to pack your bike efficiently. Take note on these quick trips on how you pack, what gear you use, and the gear you packed that you don't; next time you don't need to pack it. Once you get a setup that works for one night, that same set up normally can be used for a multiday adventure, you'll just need to bring more food.

Route Planning
What should you look for in a route and how to plan it.
A route starts as an idea, a dream of an adventure that involves you and your bike. Something along the lines of, "Dang riding (insert location/area) would be epic on my bike...". These types of adventures are the best kind because the route is something YOU find intriguing and exciting. After you get a good idea of where you would like to ride, the next few steps are how you can make your dream route happen.
1. Is it possible to ride my bike in that area?
It may seem obvious, but this is a very important first step. You do not want to waste a boat load of time dreaming of a route just to find there are no trails/roads allowing you to ride your bike. Even if there are trails or roads, sometimes it is simply not legal to ride your bike on them or they may be closed when you plan to go.
2. What amount of distance and climbing can my current fitness/skill handle?
The joy of planning a bikepacking route is that you can tailor fit a route to suit your needs and skill level. This critical judgment call can be the difference in having a miserable ride or an unforgettable one. Think to yourself, have I ever ridden on this type of terrain? Have I ever ridden that far or climbed that much per day? Plan accordingly.
3. Determine the support you need and what amenities are available to provide it.
Certain routes require different levels of support. In some areas, a grocery store is right down the road from your bikepacking friendly campsite with outlets to charge your phone and GPS unit. Your route could also take you through the wilderness where there is not a soul for hundreds of miles; you'll have to pack everything you need or else do without. Make sure you have the gear and bike necessary to handle this route. Watch out for ever changing weather in new destinations; do your research!
4. Create your route and save it to your GPS unit, phone, or mark it on your map.
You have done the leg work and laid the foundation for your route, now its time to plot it out. The best option is using a platform such as RidewithGPS (website & phone app) to plan your route. Many of these GPS platforms are made for cycling and offer many different tools and resources that help to plan your adventure. Take your notes (distance, location, amenity needs) and you plot your route where you will go, where you need to stop, and where you will sleep. Look along the route determine where you will need to go to fulfill these needs. Once you have done that, export your route to your phone or GPS unit such as a Garmin device for navigational purposes. You just created a route for yourself, congratulations!